FreePBX supports WebRTC. This will guide you through the steps to enable a websocket on FreePBX.
Requirements
Server Side versioning
| Component | Minimum Version |
|---|---|
| Asterisk | 11.5 |
| Certificate Manager | 12.0.0alpha1 |
| Core | 12.0.1beta9 |
| User Control Panel | 12.0.0beta7 |
| FreePBX | 12.0.1beta34 |
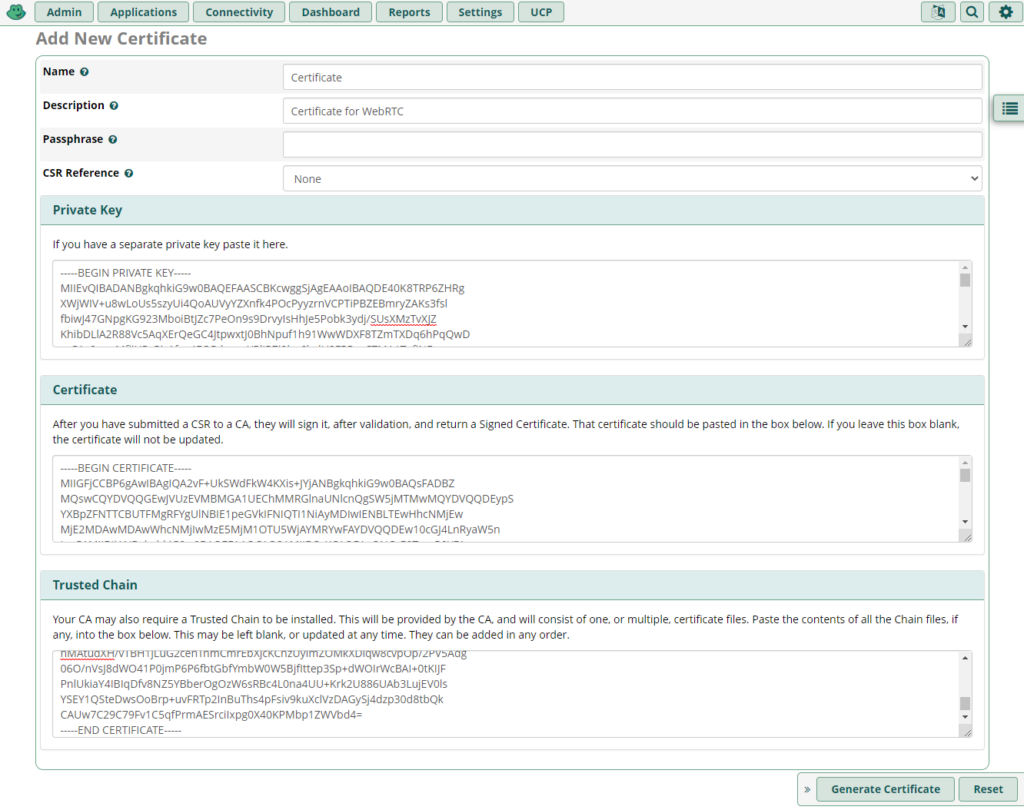
Install a certificate with your domain (not self-signed)
- From the top menu click Admin
- In the drop down click Certificate manager
If you don’t have a certificate yet, generate a Certificate Signing Request and apply for a certificate.
When you al ready have a certificate you can upload the certificate and click Generate Certificate:
Set the certificate as default (if you wish)
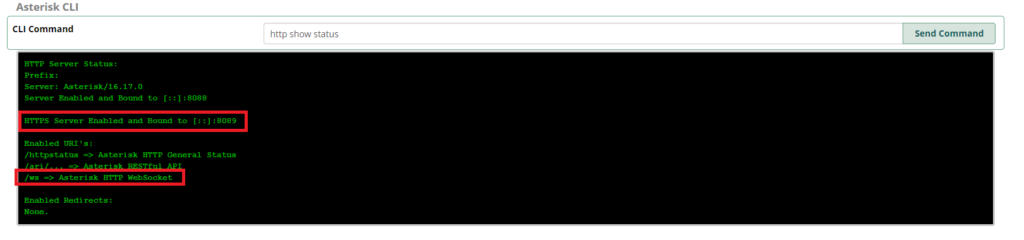
Restart Asterisk and check if the websocket is running
By navigating to Admin–>Asterisk CLI
Restart Asterisk:
Send the command “core restart now”
Check if the websocket is listening:
Send the command “http show status”
Enabling WebRTC Phone for an extension
- Click Admin
- Click Extensions
- Create or edit an extension
- Go to tab advanced and make sure you make the following changes:
- Enable AVPF
- Enable ICE Support = YES
- Enable rtcp Mux = YES
- Media Encryption = DTLS-SRTP
- Save the extensions en click Apply Config.
Adding the websocket server to the management portal.
Enter your domain in the management pane.
Adjust firewall and portforwarding
If you are behind NAT, please make sure you set up port forwarding and allow inbound traffic to the server.
Click here for more information.